Unity Products:Amplify Occlusion/Manual
Installation1. Open the AmplifyOcclusion_Unity5.6+.unitypackage 2. After Unity loads it will display the “Importing package” window, select All and click Import 3. Amplify Occlusion should now be installed in your Unity project and it should have the following directory structure:
Workflow Overview
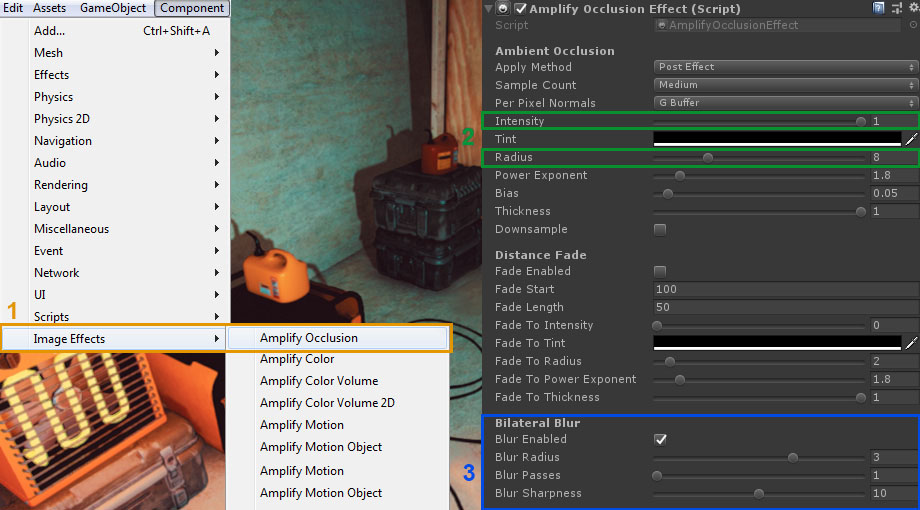
1. Select and apply “Image Effects/Amplify Occlusion” to your main camera 2. Adjust the intensity and radius. 3. Adjust the blur values until you are satisfied with the results. HD and Lightweight SRPWARNING - SRP support is only available with Post Processing Stack V2. Unity 2019 integrated PP can't be supported until adequate means are provided by Unity, this affects all images effects not just ours. 1. Import the required dependencies via the Package Manager(Window\Package Manager, Advanced -> Show preview packages)
2. Setup your project to use the intended SRP. 3. Import the Amplify Occlusion package. 4. Import the Amplify Occlusion SRP package.
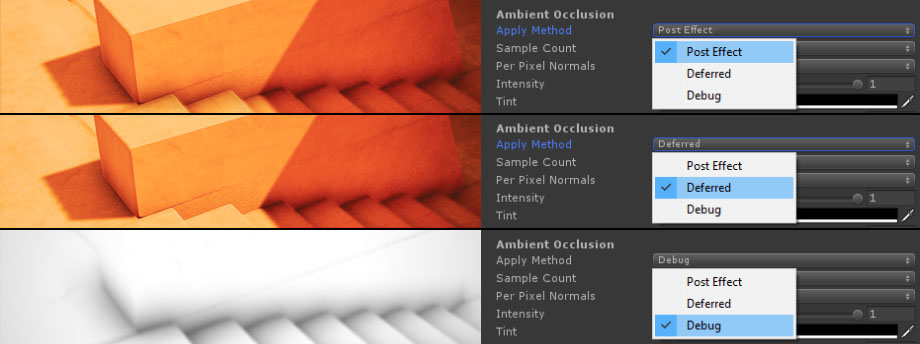
5. Add Amplify Occlusion to your Post Processing Stack profile. Be sure to check the official Unity information on how to setup your Post Processing Stack. https://github.com/Unity-Technologies/PostProcessing/wiki Ambient Occlusion ControlAmplify Occlusion offers two occlusion methods, the Post Effect mode resembles standard SSAO and will apply the effect to all objects, the Deferred option preserves bright lit surfaces by injecting SSAO before the direct light stage. A debug option is also available for added scene tweaking and flexibility.
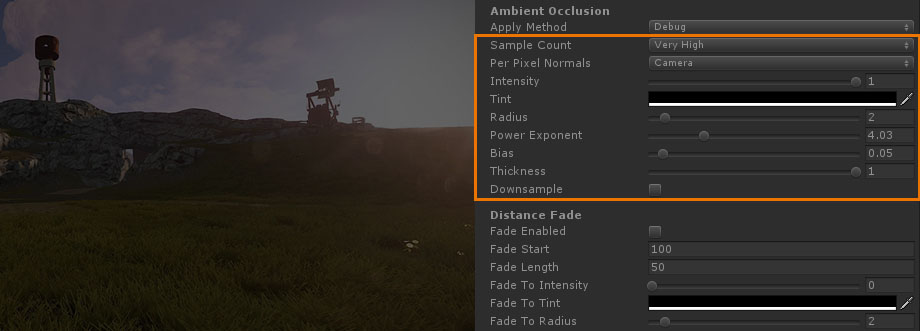
Occlusion Parameters
Sample Count
Per Pixel Normals
Intensity
Tint
Radius
Power Exponent
Bias
Thickness
Downsample
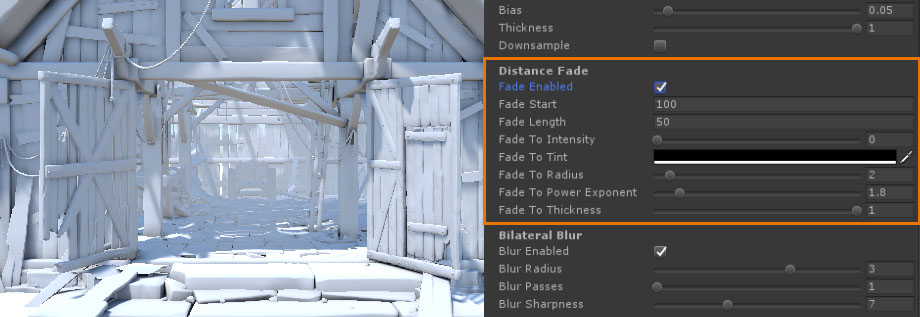
Distance Fade
The Distance Fade option provides a flexible method of fading the Intensity, Radius and Power Exponent. Fade Start
Fade Length
Fade Intensity
Fade Tint
Fade Radius
Fade Power Exponent
Fade Thickness
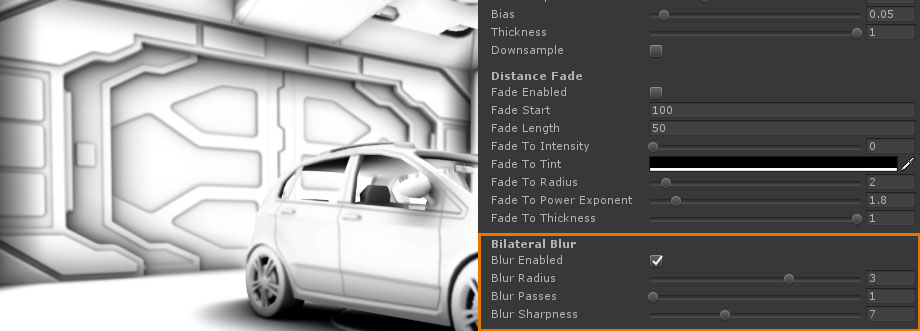
Bilateral Blur Control
Amplify Occlusion uses bilateral blur to eliminate dithering artifacts, several options are available for added control. Blur Radius
Blur Passes
Blur Sharpness
Temporal FilterAmplify Occlusion uses temporal filtering to smooth the occlusion effect through the accumulation of occlusion calculations over time, improving the quality of the effect with a slight performance trade-off and possible ghosting. Filter Blending
Filter Response
Technical ConsiderationsMobile DevicesAmplify Occlusion requires Metal or OpengGL ES 3.0 or higher. Be sure that the Auto Graphics API is not enabled in order to avoid using older OpenGL ES versions on Android devices. |