Unity Products:Amplify Bloom/Manual
Installation1. Open AmplifyBloom###.unitypackage 2. After Unity loads it will display the “Importing package” window, select All and click Import 3. Amplify Bloom should now be installed in your Unity project and it should have the following directory structure:
Workflow Overview
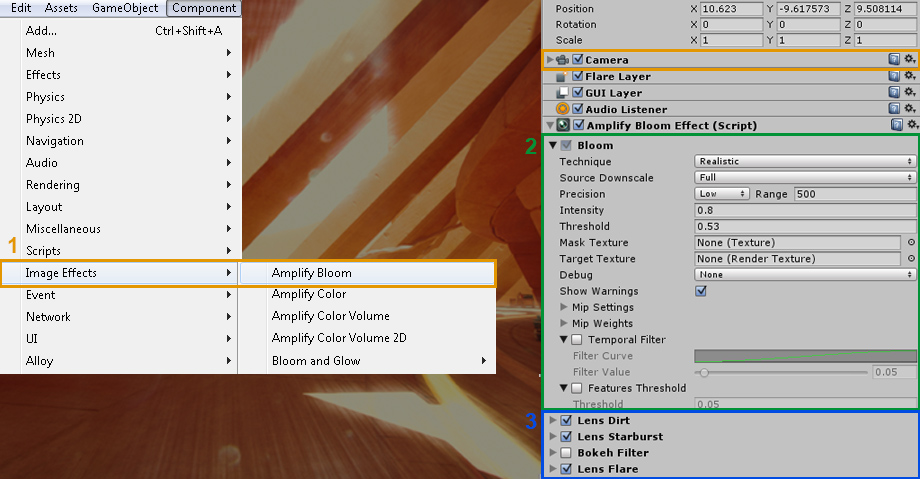
1. Select and apply “Image Effects/Amplify Bloom” to your camera 2. Main Bloom effect is always active. 3. Extra features can be used independently, each with specific customization parameters. Main Bloom
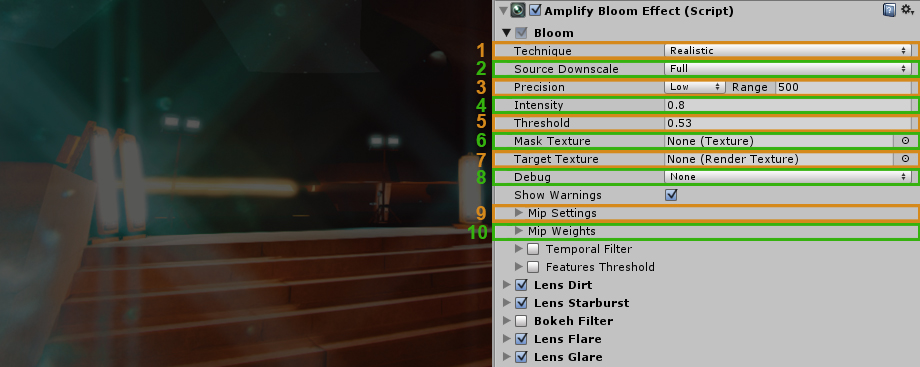
This section contains the main parameters for the bloom effect. In most cases simply adjusting Intensity, Threshold and Bloom Intensity should suffice. Additional options are available for extra tweaking, pay special attention to Precision Mode, Blur Amount and Mip parameters. Using extremely high values may have an adverse effect on performance, particularly on older devices. For debug purposes each features result can be viewed separately through the Debug drop-down selection. 1. Technique used to calculate Bloom. Realistic technique provides better visual results, Natural is a faster, less robust technique. 2. Defines sources size scale [Full/Half/Quarter] which will be used to create initial threshold results. 3. Amplify Bloom offers two precision modes, Low and High. As the name hints, Low is less processing-intensive when compared with the High Precision mode and should be used on less capable GPU’s. When Low Precision mode is selected a LDR Range value is enabled and can be freely adjusted to approximate to the HDR results. 4. Overall bloom intensity affects all the effects bellow. 5. Luminance threshold defines which areas contribute to the bloom effect. 6. Texture to be used as a mask to analyze and create bloom only on specific areas. 7. Render Bloom results to a specified target texture instead of the cameras destination render texture, useful for AR and similar applications. 8. Visually debug each feature individually. Only visible if its specific feature is active. 9. Configurable settings for Mip creation. 10. Configurable settings for Mip usage NOTE: When toggled, the Show Warnings option will output any errors or warnings directly into the Output Log. Mip Settings
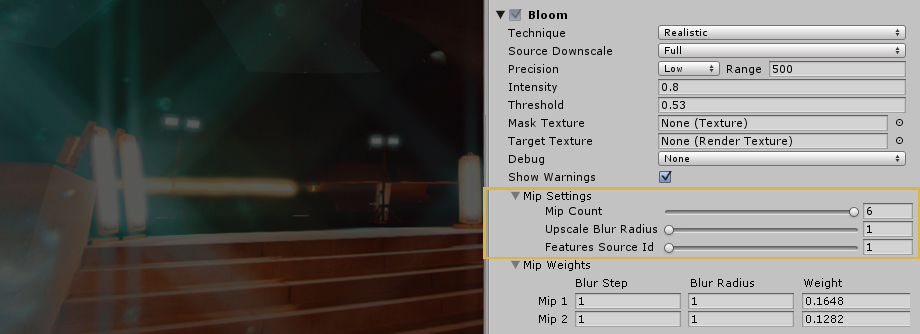
Mip Count Upscale Blur Radius Features Source Id Mip Weights
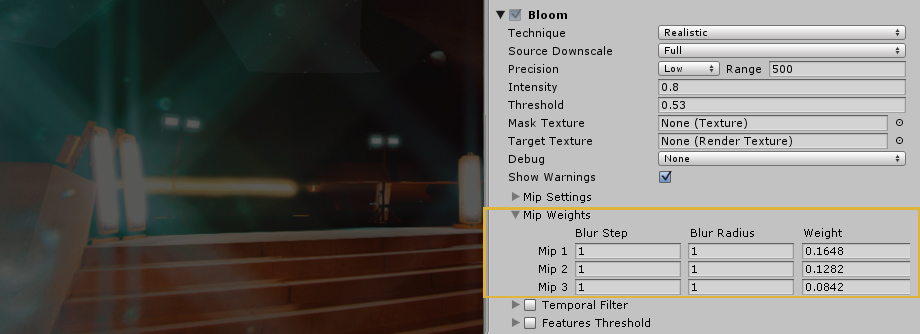
The Bloom effect is generated by a weighted combination of each of the generated upscaled Mips. From high to low, you can individually control each Mip parameters. Blur Steps Blur Radius Weight Temporal Filtering
Amplify Bloom is based on a common AAA technique which focuses on reducing flickering/firefly artifacts. On top of that it also offers additional temporal filtering to further improve final results. Filter Curve Filter Value Separate Features Threshold
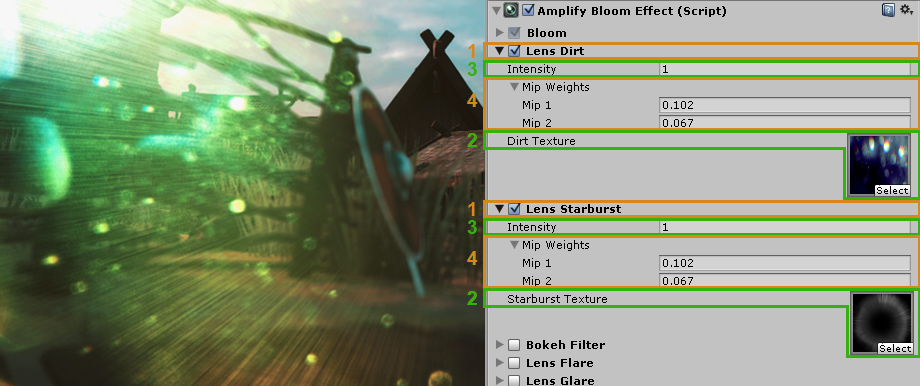
A second threshold layer can be activated which only affects Features ( Lens Flare / Glare / Dirt / Starburst ), this threshold is applied on top of the main threshold mentioned above. Threshold Lens Dirt & StarburstUse a static texture or your own custom dynamic render-to-texture to simulate lens dirt and lens starburst effect, simply set the texture to be used and adjust the intensity.
1. Toggle to use. 2. Add a texture. 3. Adjust the intensity. 4. Influence/Weight from each Mip. Bokeh Filter
A lightweight technique, Bokeh filtering simulates different camera aperture shapes allowing for more realistic results. 1. Toggle to use. 2. Bokeh filtering can either be applied on the bloom source or only affect the extra features (Lens Flare/Glare/Dirt/Starburst). 3. Type of bokeh filter that will reshape the bloom results. Advanced Settings
Rotation Sample Radius Aperture Focal Length Focal Distance Max CoC Diameter Lens Flare
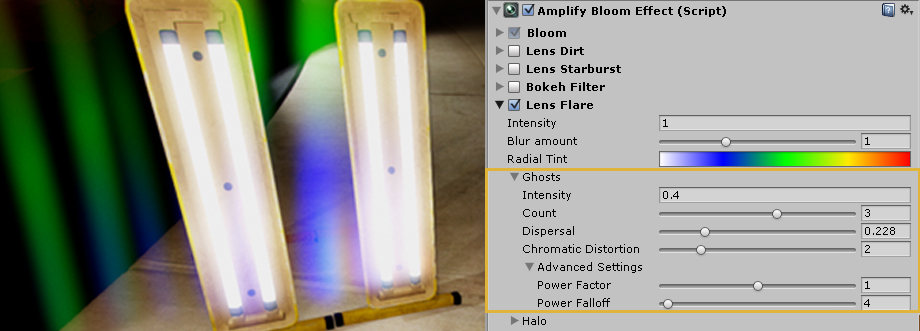
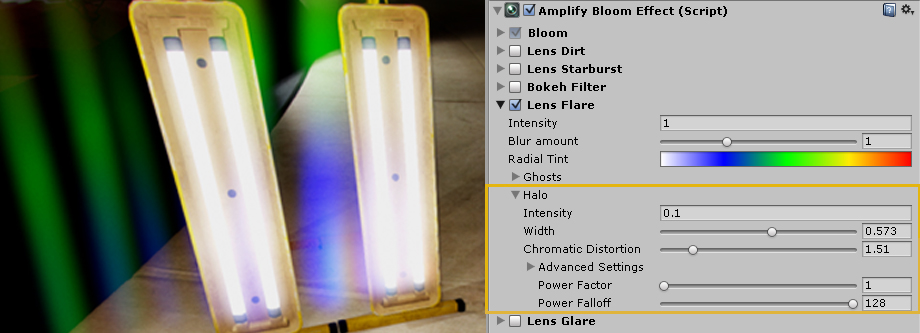
Pseudo Lens Flare with procedurally generated Lens Ghosts and Halo from bloom results. 1. Toggle to use. 2. Defines the overall intensity for both halo and ghosts 3. The amount of blur applied on generated halo and ghosts. 4. Dynamic tint color applied to both halo and ghosts according to their screen position. Left most color on gradient corresponds to screen center. Ghosts
Intensity Count Dispersal Chromatic Distortion Amount of chromatic distortion applied on each ghost. Power Factor Power Falloff Halos
Intensity Width Chromatic Distortion Power Factor Power Falloff Lens Glare
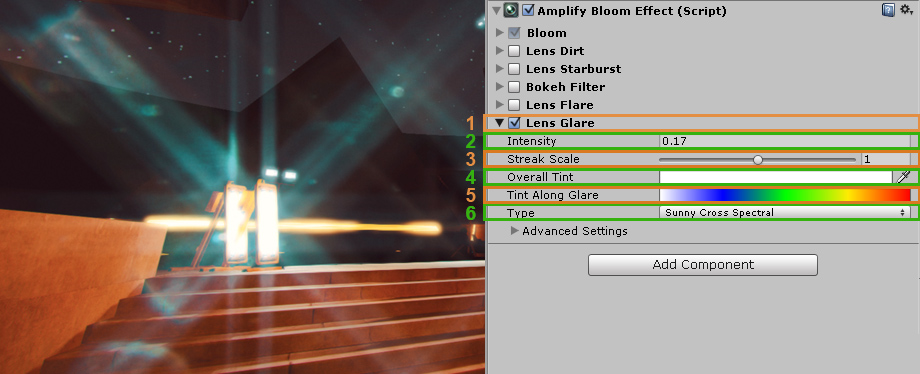
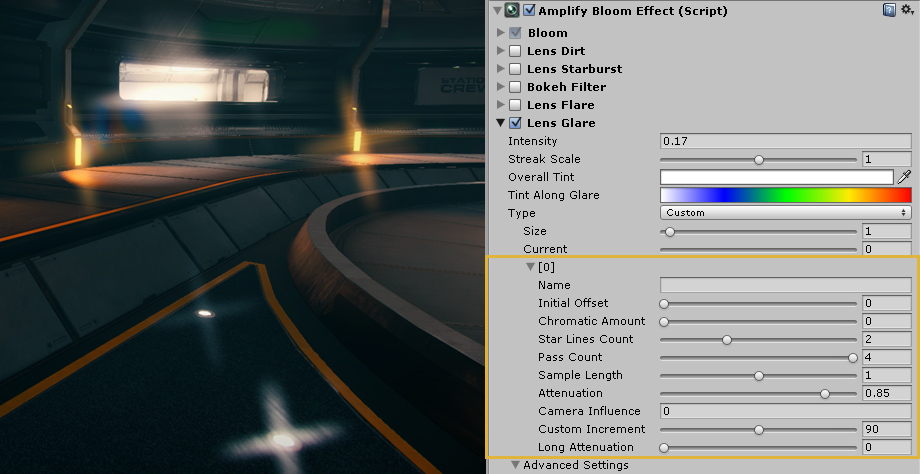
Simulate a vast amount of Anamorphic Lens Effects, select from a Preset Shape list or create and tweak your own glare effect. 1. Toggle to use. 2. Defines the glare intensity. 3. Overall glare streak length modifier. 4. Tint applied uniformly across each type of glare. 5. Tint along each ray for spectral glare types, leftmost color on the gradient corresponds to sample near bloom source. 6. Available glare presets. Custom Shape TypeAnamorphic Glare effects shape are customizable by selecting the Custom item on the preset list. After that, simply define the amount to use and adjust the values below.
1. The amount of custom glare effects. 2. Currently selected custom glare from the array bellow.
Individual Custom Glare ValuesName Initial Offset Chromatic Amount Star Lines Count Pass Count Sample Length Attenuation Camera Influence Custom Increment Long Attenuation Advanced Settings
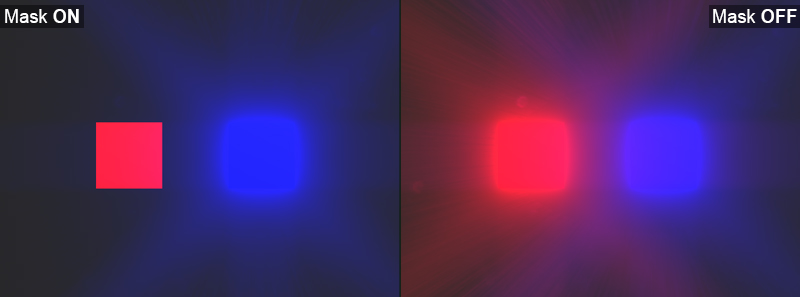
Per Pass Displacement Max Per Ray Passes Max amount of passes used to build each ray. More passes means more defined and propagated rays but decreases performance. Dynamic Masking and Augmented RealityThis sample demonstrates how to generate dynamic masks when using Amplify Bloom. To download the Amplify Bloom Mask Sample project, click here. Note that the masking sample relies on a second camera that renders the objects mask using a very simple unlit color shader, e.g. white on black background (or vice versa), into a Mask Render Texture, the RT is then used to define which objects should have the bloom effect applied. Detailed instructions can be found in the Readme file included in the package Assets folder.
Vuforia Augmented reality and similar applications such as Hololens or Magicleap usually require a somewhat similar setup in order to mask real world footage. We prepared a functional Vuforia package that should serve as a basis for your project requirements, to download the Amplify Bloom AR Mask Sample project, click here. You will need to download Vuforia Unity Plugin, detailed instructions can be found in the Readme file included in the package Assets folder. Technical ConsiderationsMobile DevicesFor performance reasons we recommend extensive testing on your target mobile platforms before licensing it. Mid-High end devices recommended, consider using the Natural technique. Bokeh FilteringKeep in mind that the Bokeh Filtering available in AB is not a replacement for DoF Bokeh effects, it’s a simple and lightweight complement for fast bloom based bokeh shape effects. TechniqueRealistic technique provides a robust method on preventing temporal stability, however it its more GPU intensive. Natural technique uses a simple bilinear upscale for each of the Mips, making it faster but not as good on preventing temporal stability issues. Consider using Natural technique on mobile platforms. |
