Unity Products:Amplify Color/Manual
Installation1. Open AmplifyColor###.unitypackage 2. After Unity loads it will display the “Importing package” window, select All and click Import 3. Amplify Color should now be installed in your Unity project and it should have the following directory structure:
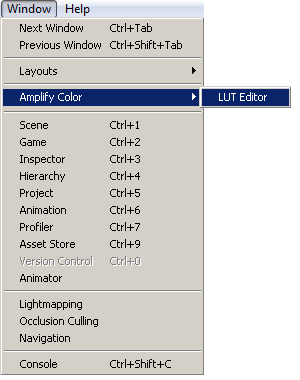
Photoshop Workflow1. Open the Amplify Color LUT Editor Window.
2. Open Adobe Photoshop CS 5.1 or greater and go to the Edit > Remote Connections… menu. Make sure the “Enable Remote Connections”(1) box is checked. Choose a Password(2) and note it down, we’ll need it later on. Also if you plan on using Photoshop on a different machine than the one running Unity take note on theHostname field or the IP field(3).
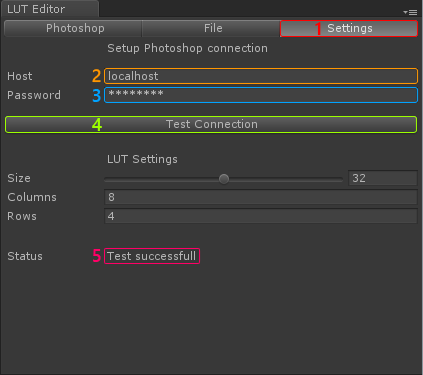
3. On the Amplify Color LUT Editor window go to the Settings tab (1).
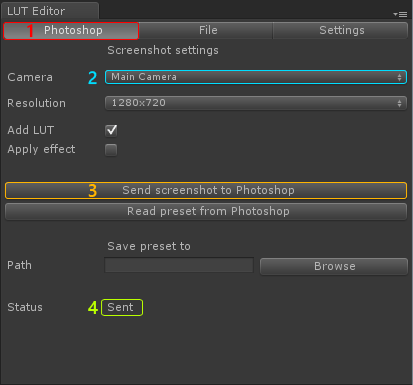
4. On the Host field(2) type the Hostname or IPv4 Address of your Photoshop client. Repeat for your Password field(3). 5. Note that for this step to work you need to have Photoshop running. Click on Test Connection(4). 5.1. If a the Status field(5) “Test successfull” is displayed, then the Amplify Color LUT Editor is correctly configured and ready to use. 5.2. If a connection can’t be established with Photoshop a Status of “There was an error. Check if the host is avaliable to this machine” will be displayed. In this case either the Host field isn’t correctly configured or futher troubleshooting needs to be done, including proper configuration of any firewall in the system. For more help troubleshooting Photoshop Touch proceed to http://kb2.adobe.com/cps/894/cpsid_89485.html . 5.3. In case there is an error with the password you will get an Status error of “There was an error. Try checking the password”. This means the connection is working correctly and the Amplify Color LUT Editor was able to connect to Photoshop, but the password isn’t configured correctly. 6. On the Amplify Color LUT Editor window go to the Photoshop tab(1).
7. Select the Camera(2) you wish to use for the screenshot. If your scene doesn’t have a camera, you’ll need to create one. 8. Press Send screenshot to Photoshop(3). If the operation is sucessfull, you’ll see “Sent”(4) displayed in the Status field, and after a few moments the scene’s screenshot should be in your Photoshop. 9. On Photoshop perform any color adjustment you wish. Notice that only color adjustments will translate back into Unity, i.e., filters such as blur or noise effects will not work. If you are not sure which tools you can use, the color adjustments can be found in the Image(1)menu.
10. As you may have noticed, Amplify Color adds color info into your screenshot. This is used to create the color profile in Unity and you shouldn’t resize or make any modifications to it, besides color transformations, since this will cause incorrect unwanted colors in your game. 11. When you’re happy with the final result in Photoshop, go back to Unity.
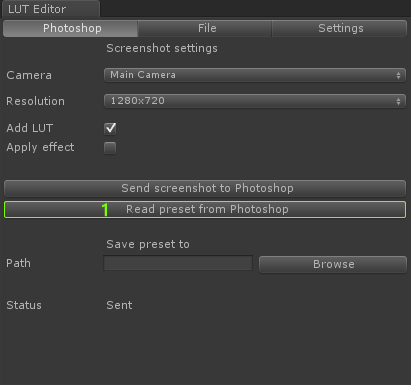
12. Press Read preset from Photoshop(1). This will read the image from Photoshop and use it to create a color preset.
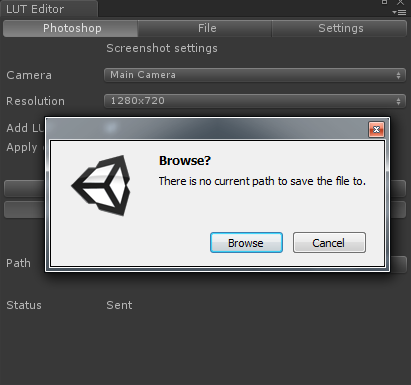
13. If there is no preset currently selected, Amplify Color LUT Editor will ask if you wish to browse for one. Click Browse and select the file you wish save the color preset to.
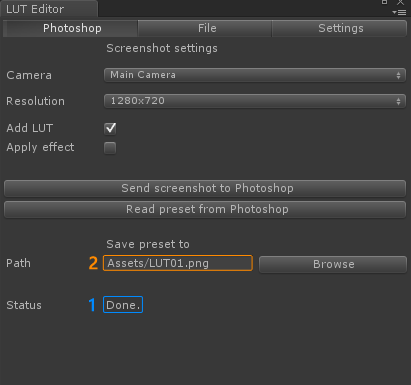
14. If the operation is successfull, the color preset file will be saved and the Status(1) field will display the message “Done”. The Path(2) field will be updated with the last successfully saved color preset file.
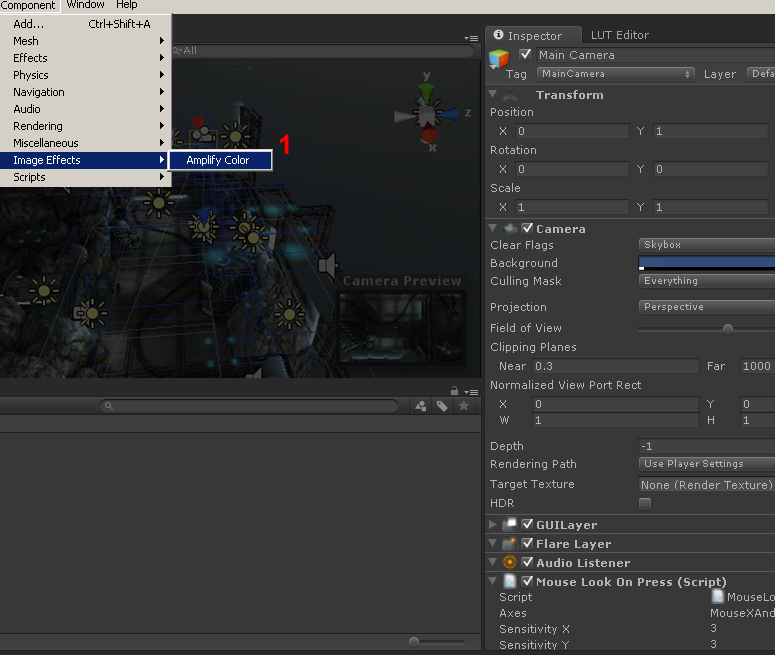
15. Select the camera you wish to add the effect to. Add the Amplify Color (1) Component to the selected camera.
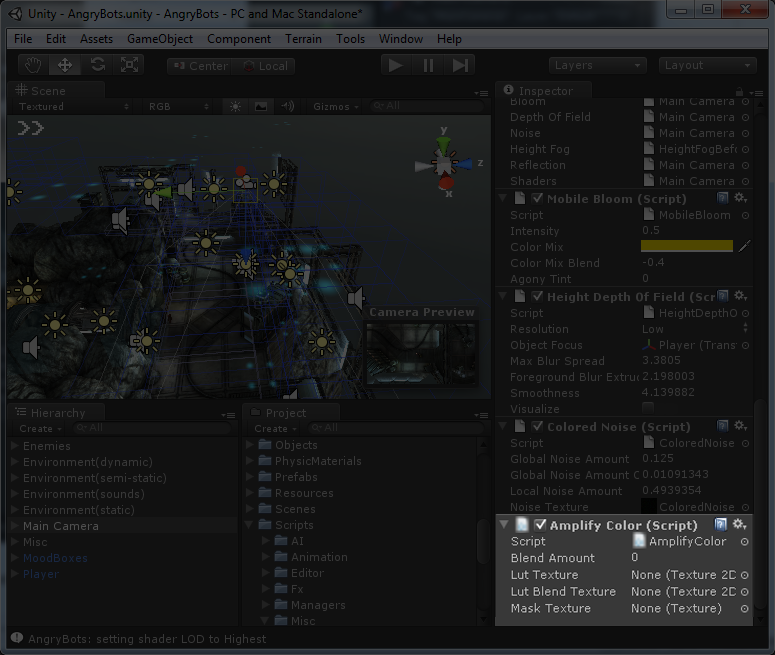
16. Go to the Amplify Color component and on the field Lut Texture(1) select the texture you’ve just saved from Photoshop.
Check your game window. It now should display the color profile you’ve imported from Photoshop.
Standard/Other Image Editors WorkflowHow to Use Amplify Color – Standard Workflow 1. Open the Amplify Color LUT Editor Window.
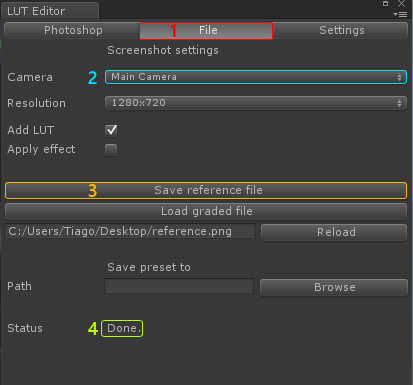
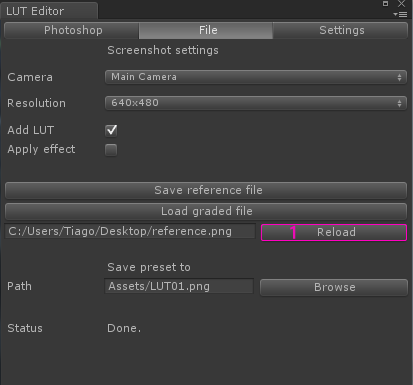
2. On the Amplify Color LUT Editor window go to the File tab(1).
3. Select the Camera(2) you wish to use for the screenshot. If your scene doesn’t have a camera, you’ll need to create one. 4. Press Save reference file(3) and select where you want to save a reference file. If the operation is sucessfull, you’ll see “Done”(4) displayed in the Status field. 5. On your image editor of choice perform any color adjustment you wish. Notice that only color adjustments will translate back into Unity, i.e., filters such like blur will not work. 6. As you may have noticed, Amplify Color adds color info into your screenshot. This is used to create the color profile in Unity and you shouldn’t resize or make any modifications to it, besides color transformations, since this will cause incorrect unwanted colors in your game.
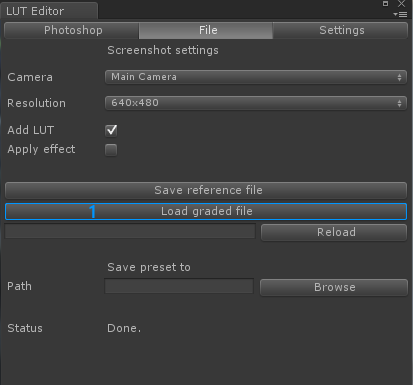
7. When you’re happy with the final result, save it and go back to Unity. 8. Press Load graded file(1) and browse to the file you have just saved. This will read the image and use it to create a color preset.
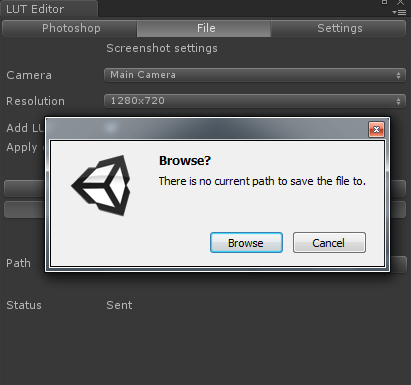
9. If there is no preset currently selected, Amplify Color LUT Editor will ask if you wish to browse for one. Click Browse and select the file you wish save the color preset to.
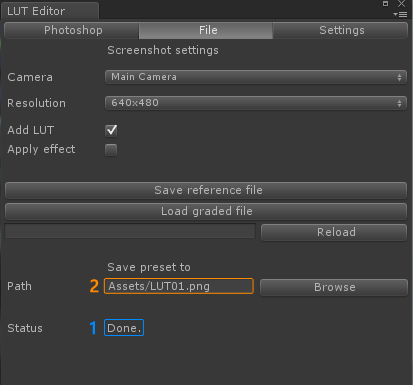
10. If the operation is successfull, the color preset file will be saved and the Status(1) field will display the message “Done”. The Path(2) field will be updated with the last successfully saved color preset file.
11. If you wish to iterate between the image editor and the final result in Unity you can use the Reload(1) button. This will read the last graded file and update the last saved color preset.
12. Select the camera you wish to add the effect to. Add the Amplify Color (1) Component to the selected camera.
13. Go to the Amplify Color component and on the field Lut Texture(1) select the texture you’ve just saved from your favorite image editing program.
Check your game window. It now should display the color profile you’ve imported from the graded file.
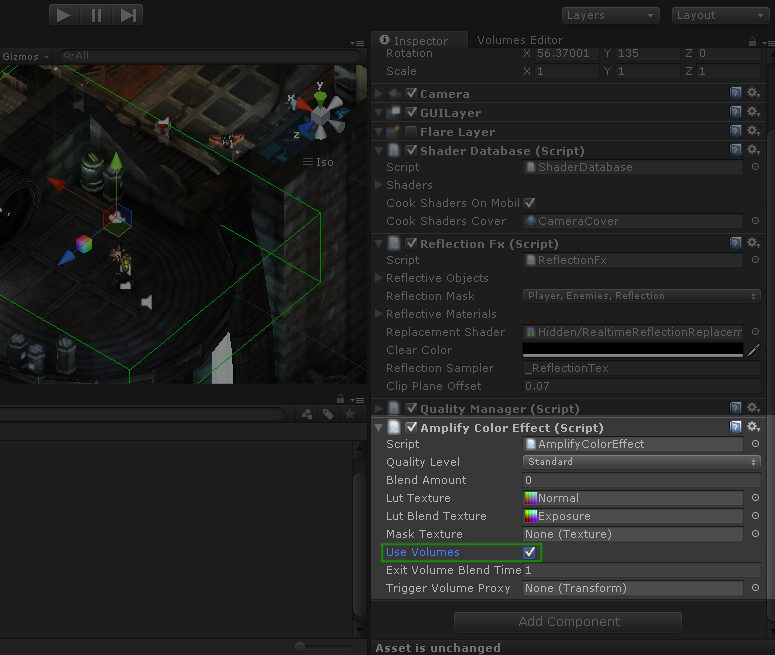
Color Volumes1. In order to use Color Volumes simply toggle the “Use Volumes” checkbox in your Amplify Color Effect script.
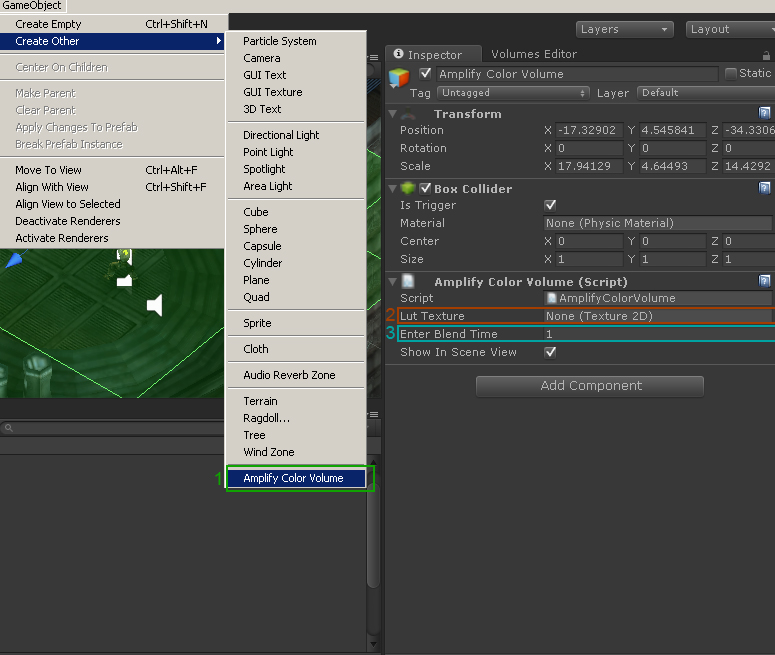
2. To add volumes to your scene simply create the new Amplify Color Volume game object(1), define its LUT(2) and blend(3) time.
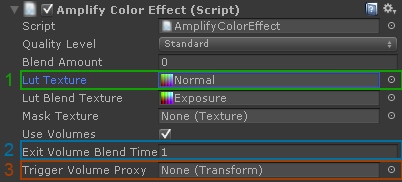
3. When using volumes, if your camera or proxy object are outside of a volume Amplify Color will automatically revert to the default LUT(1) in you Amplify Color Effect script. To set the duration of the default blend simply change the Exit Volume Blend Time(2) .
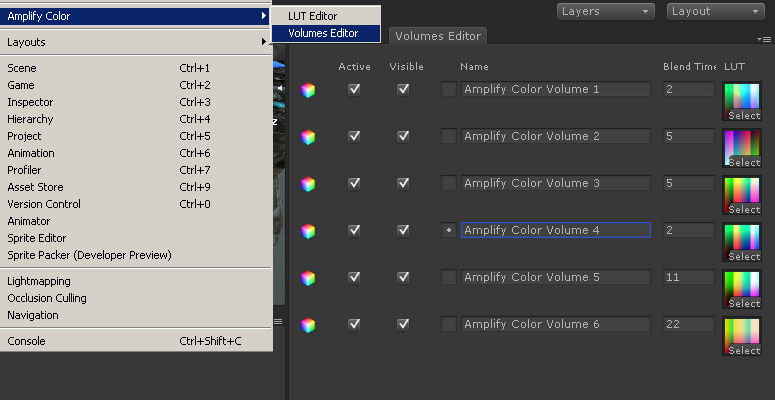
In some cases it may not be possible to have the actual camera inside the volume, you can easily use a custom model (e.g.Player Model) for position tracking(3). 4. The Volumes Editor window provides additional information and centralised control of your volumes.
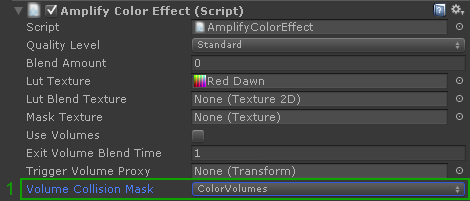
5. In order to further improve performance, especially in complex scenes, Amplify Color allows you to set a Volume Collision Mask(1). Simple add your volumes to a custom layer and set it up accordingly.
Third-party Effects & Events with Volume Blending1. Be sure that the “Use Volumes” option is toggled.
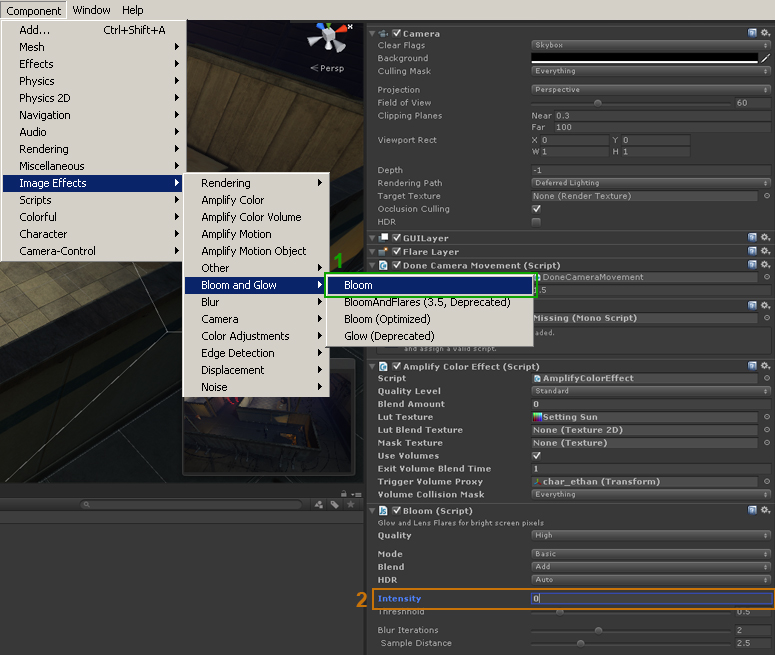
2. Add the effect or custom event to the camera. In this example we will use the standard Bloom Image Effect included in Unity; since we don’t want the Bloom effect to be visible initially we will set the Intensity to zero.
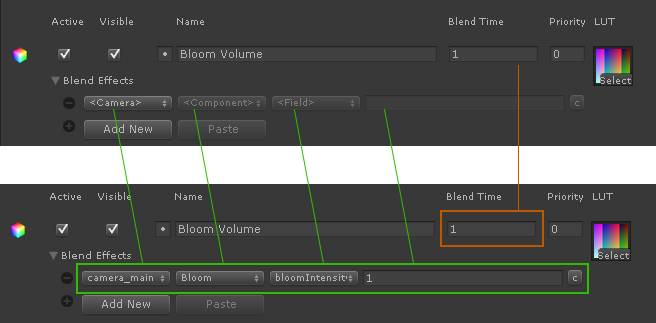
3. Open the Volume Editor and add a new Blend Effect.
4. Select the Camera, select the Bloom component and set the intensity value to 1 and if required, alter the blend time.
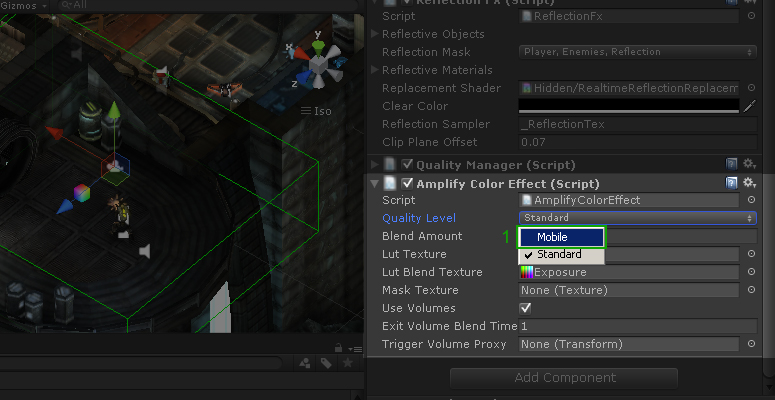
Quality LevelThe Standard mode provides the highest quality/accuracy possible. In version 1.4 we introduced additional mobile specific optimizations, to enable them simply select “Mobile” in your Amplify Color Effect script quality settings(1). Although not obligatory for mobile builds the Mobile quality level will certainly provide a performance boost on older devices at a negligible cost in accuracy.
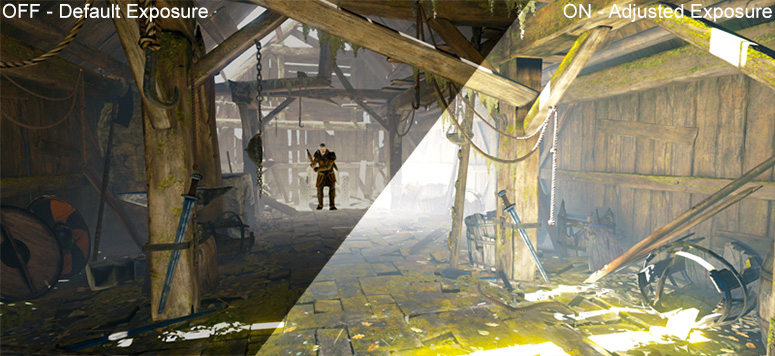
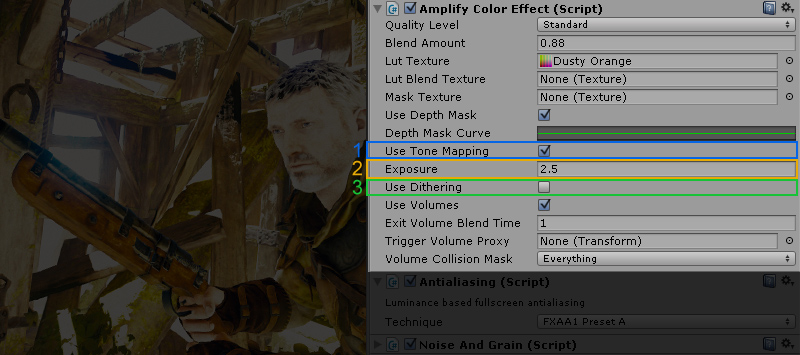
HDR Dithering, Filmic Tonemapping & ExposureIn addition to high-quality and high-performing color grading Amplify Color now offers two simple parameters for Filmic Tonemapping (HDR) and Exposure adjustment without the need of additional camera components or 3rd-party effects; exposure values can also be adjusted in LDR.
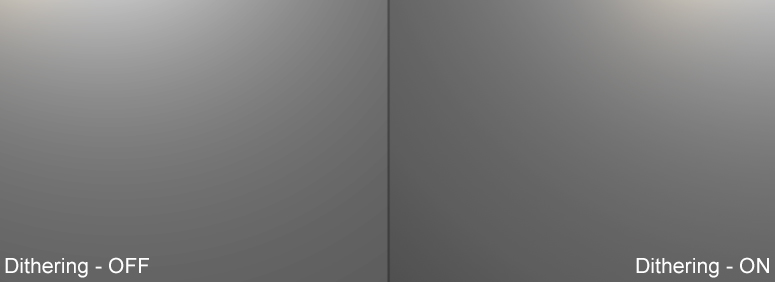
1. Tone Mapping can be toggled directly in the Amplify Color Component. 2. Exposure values can be directly adjusted without the need of additional LUT variation or camera components. 3. HDR Dithering can be toggled directly in the Amplify Color camera component, the adjustment will also work in mobile devices but we do not recommended using it on lower end devices.
HDR Dithering example
|
