Unity Products:Amplify Impostors/Custom Baking
Product Page - Manual - Custom Baking - Lightmap Baking - Roadmap
Introduction
The standard baker gathers the deferred GBuffer information that contains every material data for a typical PBR rendering. This, however, might not always be necessary or might not even be enough. In some cases the object you want to create the impostor for has some special realtime shader effect that a simple PBR rendering doesn't cover. In other cases you might just want to reduce the amount of data being generated because you have higher platform constraints (ie: mobile). The idea behind custom baking is allowing you to tell the tool what you want to bake and how you want to render it on a case by case scenario.
Requirements
Creating the shaders for this guide can become quite difficult so we have included in our package the necessary templates and node which can be used with Amplify Shader Editor plugin, making the process a lot easier and faster. If you are not familiar with it, Amplify Shader Editor is our own award winning shader editor in which you can create shaders in a node-based graph editor without knowing shader code. The guide assumes the use of Amplify Shader Editor so if you're interested in an intuitive node-based shader authoring tool feel free to check out its store page here. You can also know more about it in its wiki page here.
You can find the files and samples of this guide in the package at AmplifyImpostors/Examples/Scenes/CustomBaking. If you are an advance user and you want to create the shaders manually you can still follow the guide by comparing the results with the given sample.
Shader Graph has limited the ability of using custom code which prevents Amplify Impostors from being supported. Consider using our alternative, Amplify Shader Editor, that's been made from the ground up to be extensible and adaptable to any pipeline requirements.
Description
This guide demonstrates the process of creating the same custom impostor found in the samples. The intention is to create the impostor for an object that contains a special dynamic shader. This shader adds a procedural layer of paint on top of the object. This layer of paint is procedural in the sense that it uses the object position to calculate a pseudo-random color for the paint. If we were to bake a regular impostor for this object we would lose this procedural behavior and end up with a static version instead.
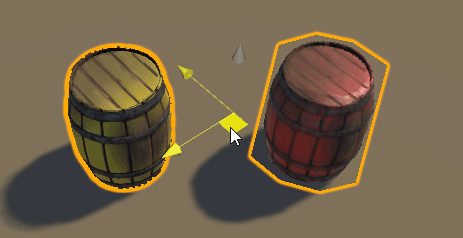
Notice how the left real object changes color while the right impostor stays a static red.
To accomplish this two special shaders are needed. One is a shader that will be used instead of the original shader of your object material to bake the different texture maps. This shader contains the different outputs that will be used to generate the different textures and what their channels contain. We'll call this the "bake shader". The other shader will use the generated textures and render the impostor correctly with the intended custom effect you might be looking for. This is the shader you will use in your product that creates the impostor effect. We'll call this one the "runtime shader".
Finally we need to setup the outputs and link the shaders to them, we do this using a preset asset file that you can create and reference in the impostor component.
Create Bake Shader
- Right click in your project and create a new Impostor Bake shader.
NOTE: If you can't see this entry make sure to import the Impostors package AFTER the shader editor and with a shader editor canvas open to detect changes.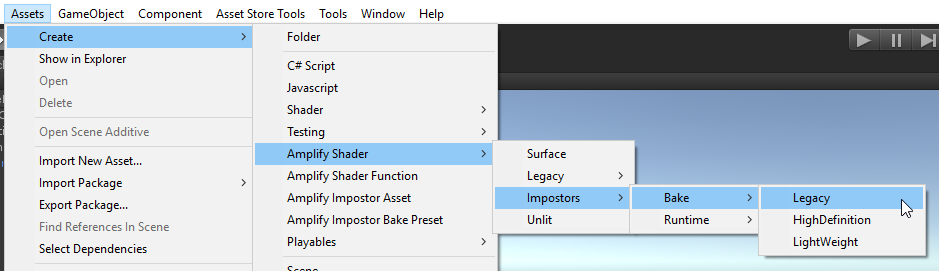
- With the shader open in the editor start by placing the texture samplers and pack them to the chosen output and make sure the property names match the original shader.
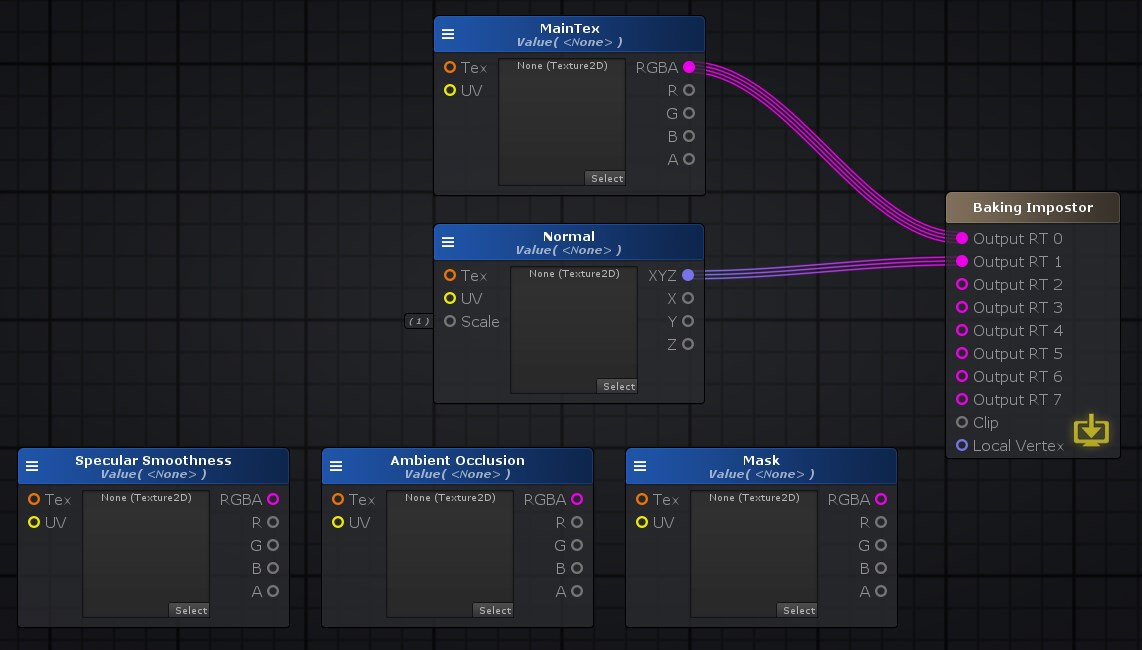
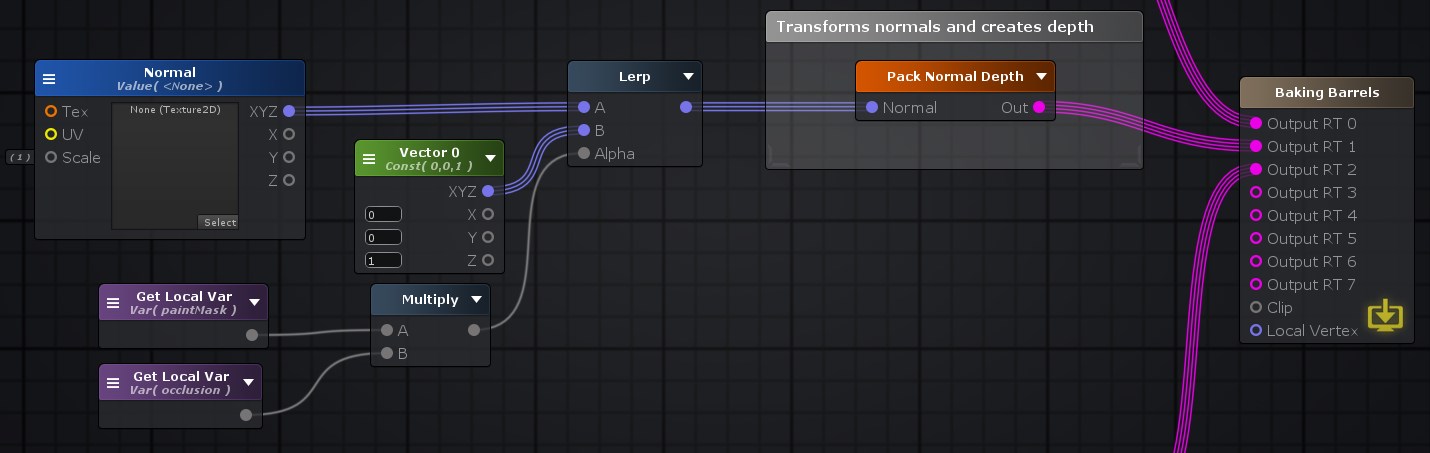
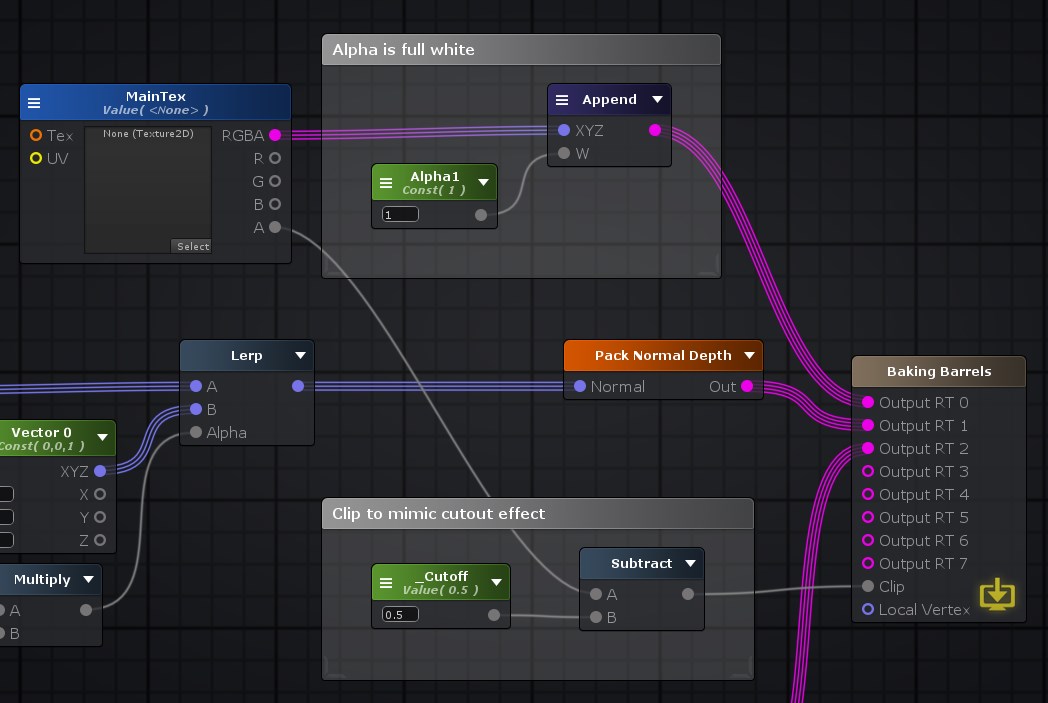
- Then create the graph nodes and connections that correspond to the static parts that we can bake into maps, in our case that's everything except the procedural color part. Also, because we'll later need the special mask to recreate the final procedural effect and because we want to save some texture memory we will pack it alongside the remaining data and connect it to the same single output.
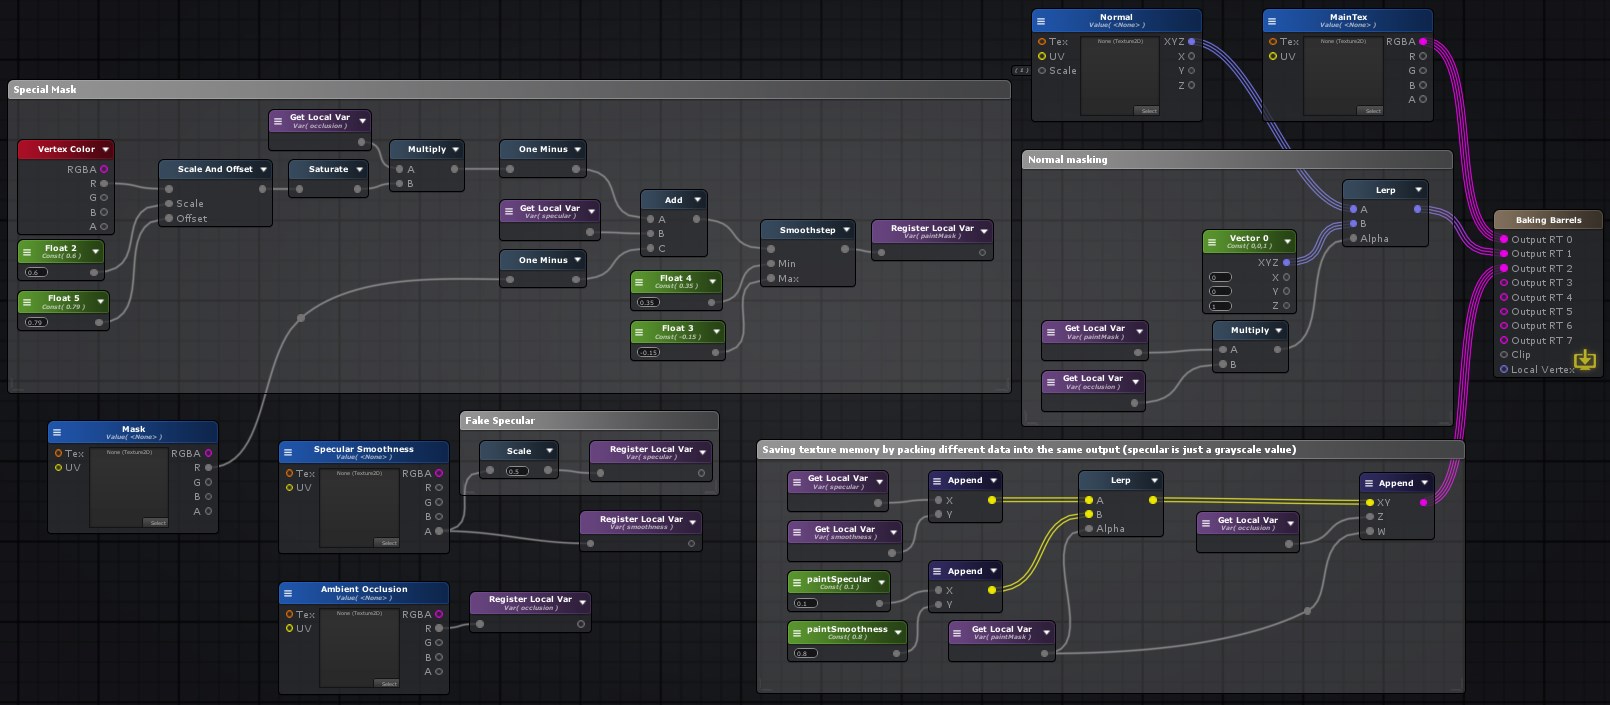
- Add the "Pack Normal Depth" shader function node which will transform the normals into the necessary space and create the depth information in the alpha channel.
- (optional) If your object shader uses a "Cutout" effect make sure to mimic it by subtracting the clip mask value and connecting it to the "Clip" output.
Create Runtime Shader
- Right click in your project and create a new Impostor Runtime shader.
- In the editor add a new "Amplify Impostor node", connect the Albedo, World Normal and Alpha outputs to the available inputs in the master node. Hit the save button in the ASE canvas.
NOTE: Doing this should compile an Impostor compatible shader that uses the most important data from the bake, however we still need to customize it further to support the intended procedural effect.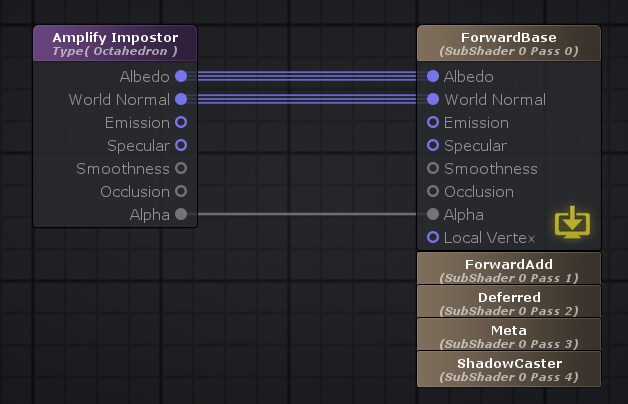
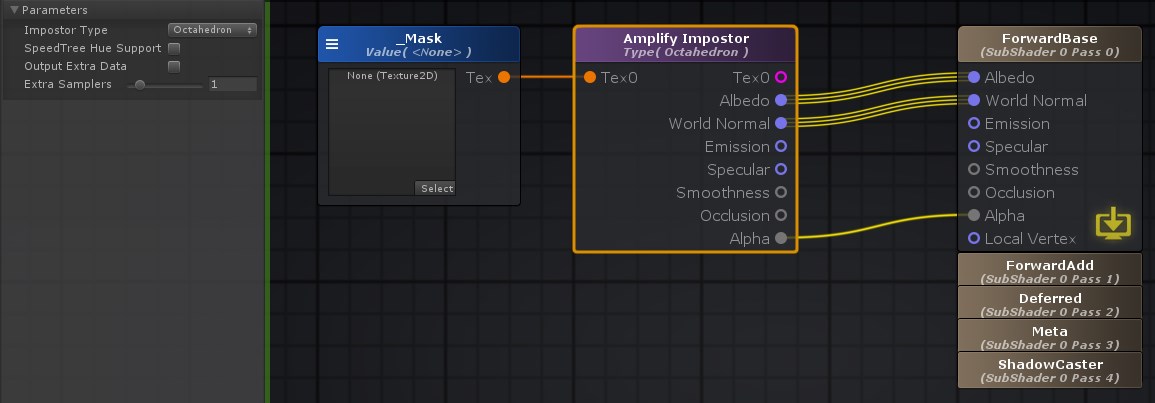
- In our case we want to fetch a custom map not available in the original outputs, we do this by selecting the Impostor node and changing the "Extra Samplers" field to the appropriate number (in our case 1) and connecting a Texture Object node with a name that you will later use to reference this map. In this case we call it "_Mask".
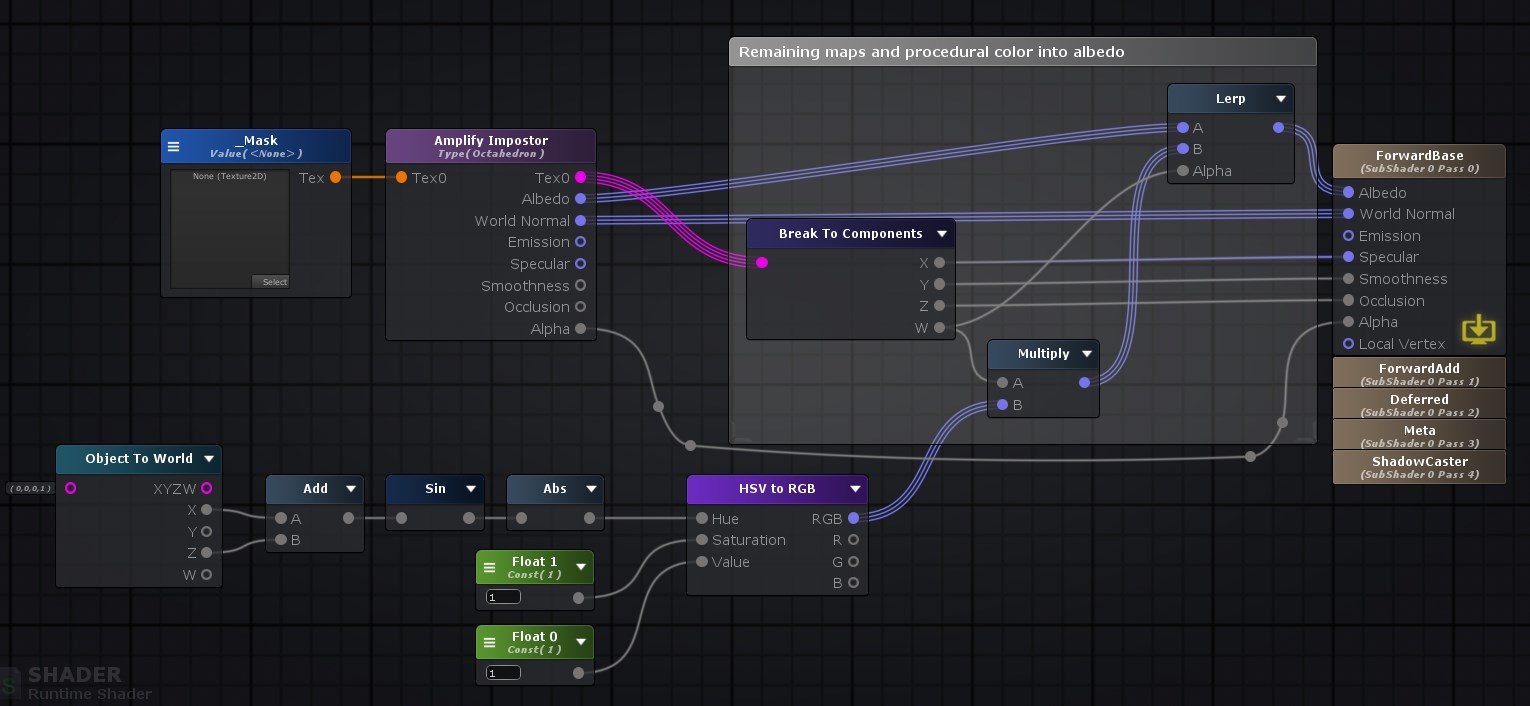
- We now need to create the procedural logic from the original shader which uses the object XZ position in a wave function to generate a color.

- Finally filter the procedural color to the mask from the extra output and connect the appropriate channels to their outputs. Save.
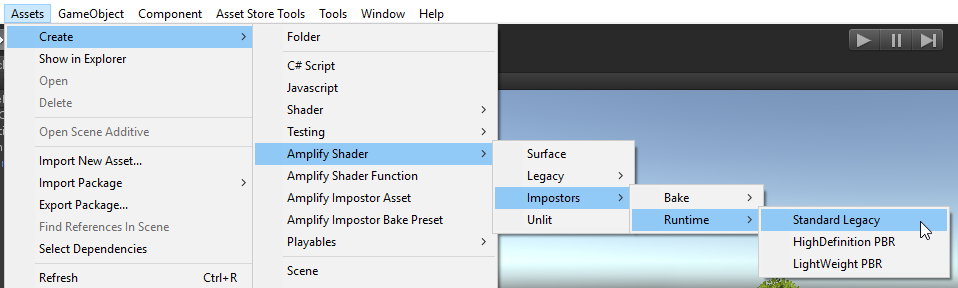
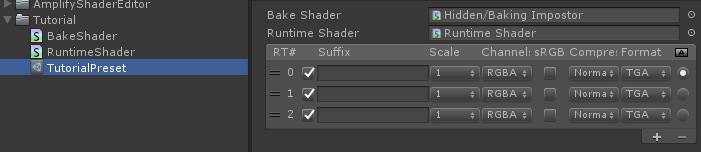
Create Bake Preset
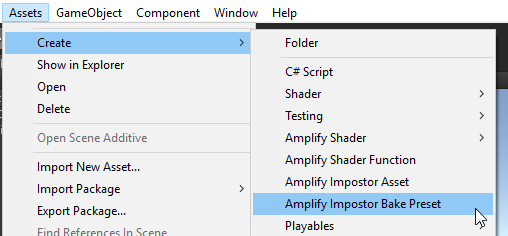
- Create a new preset by going to "Assets > Create > Amplify Impostor Bake Preset" or hitting the "New" button in the impostor component. Select it in the chosen project location.
- Assign the shaders to the preset and add or remove outputs until you have the same number of usable outputs from the shader created in [Step 2].
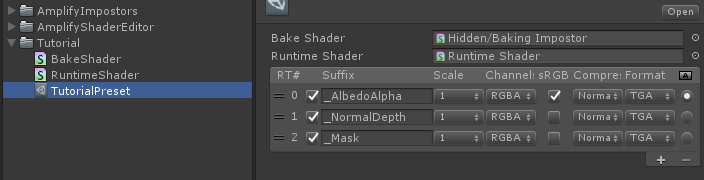
- Configure the outputs to represent the data they hold. In this case the first output holds albedo color data in RGB so we mark it as sRGB color space. Do make sure to mark the output that contains the alpha channel, in this case it's the first one so we leave the radio button as is.
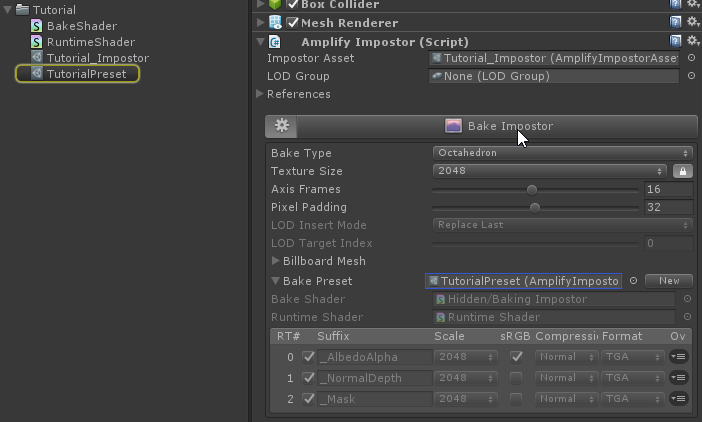
- Now, simply select the new preset in the impostor component, override the fields if necessary and hit "Bake Impostor"
Final Result
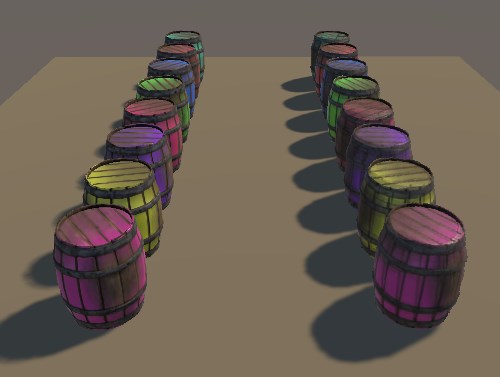
This is the final result, notice how now the impostors on the right can now mimic the effect from the original objects and display the procedural colors as it was intended. Furthermore, these impostor only use three maps to achieve it and not 4 as the standard ones do.